Blog

How’d It Grow? Premium Peas

Are you getting ready to plant peas? It’s still too early here in zone 6, but I thought I’d mention this variety while there is still time for ordering from seed catalogs.

Description and Source

Premium is the name of the pea, which can be a little confusing if you go looking for it online since ‘premium’ is also used by seed companies as a descriptor. This particular variety is available exclusively from Johnny’s.

Premium is open-pollinated and resistant to Fusarium Wilt.

Please note that Johnny’s sells both untreated and treated seeds, the latter of which is coated with a fungicide to protect them from diseases such as damping off. When I contacted Johnny’s about the treatment, the representative indicated that treated seeds are not approved for organic growing.

Planting and Growing Notes

Last year on April 1, I sneaked into the garden on that one flashy warm day we had here in MA and got these guys planted in a nine-foot row under a mini grow tunnel (with a plan to remove it as they grew). Using Johnny’s intensive spacing guidelines, I planted them in a 3-inch band, 1 1/2″ apart, around 25 per foot. These peas do not grow tall, and although a trellis is not needed, I set up supports at the time of planting to keep space for other plants and to help make picking easier.

img_20180614_085012740
‘Premium’ also grew well in a pot. Supported on twine and bamboo, they were easy to pick. Following this crop, I was able to fit in a crop of scarlet runner beans.

Soon after I planted them, the temperature dropped precipitously, down into the twenties. And then we had a long spell of cold, wet weather. I’d been hoping that the grow tunnel was going to warm the soil and help them move along, but those pea seeds didn’t budge for nearly three weeks, for so long without a sign that I thought I’d lost them. Around the time they sprouted, I put in another crop of peas in a pot on my front sidewalk, and those guys matured only a day or two later than the ones I planted  on April 1.

Harvest

img_20180614_112128376
After shelling, I had about a pound of peas from a 9-foot row.

Most of them were ready for picking around mid June. Even if I account for that cold snap right after I planted them, they took a little longer to mature than the 51-day average noted by Johnny’s. Still, I was able to get my next crop in the garden easily while they were finishing up.

The nine-foot row in my garden yielded a little more than 1 pound of shelled peas.

How’d they taste? After eating Premium my teens decided that they do like peas after all. The flavor was fresh and sweet, not metallic or bitter, even for ones that I missed and left on the vine a little too long.

The ones that I blanched, froze on a paper-towel-lined tray, and then stored in freezer bags held well for a few months.

Bottom Line?

I’m planting these again in 2019, probably  a week or two into April depending on weather trends. My portable grow tunnel might have saved the peas from rotting, but didn’t warm up the soil enough to make planting worthwhile so early in very cold temperatures.

Though some peas like Bistro may offer higher yields, I’m generally interested in moving things along to fit in a succession of crops in a short time. I hear Strike is another good one to try for early yield.

Best of all, they tasted good and got my teens to change their minds about peas.


How’d It Grow? Dara, Wild Carrot

This plant was the biggest happy surprise of last season for me. Many thanks to the grower at Holly Hill Farm who sold me on it at their annual seedling sale.

Dara is an ornamental also known as False Queen Anne’s lace, ornamental carrot, and wild carrot. In my garden, some of the initial flowers on this plant opened up into broad 5-inch blooms, ranging from white to purple-pink to dark purple. Flowers that bloomed later in the season tended to be smaller, though still around 3 inches in diameter.DSC_0203


DSC_0099

It’s not a fussy, formal flower. Here it is, mingling with some orange cosmos. I get a bit of shade in my garden, so the Dara grew on the tall side of the standard 36-50.”

Pollinators of all shapes and sizes loved the blooms, and I enjoyed the buzz they brought to the garden so much, I cut only a few of them for bouquets.

Generally, they are a long-lasting cut flower, but some of them drooped right away in the vase and never revived. I learned later from the book Floret Farm’s Cut Flower Garden (which by the way, for locals is currently available through Old Colony Library and Hoopla) that it’s best harvested “when flowers are fully opened and are lying flat.” Older blooms begin to curl up, like umbrellas caught in the wind. DSC_0231

I’ve read dueling information about whether this plant is a garden thug, perhaps because Queen Anne’s Lace, the white flower often seen growing in meadow’s ditches, and scrubby patches, is listed as a noxious weed in some states (not in MA). It might also be worth noting that Johnny’s Selected Seeds specifically calls this plant False Queen Anne’s Lace.

Expert gardener Ken Druse discusses his experience with Dara on the podcast A Way to Garden. Ken–who enjoys this flower, but does take care to contain it– says his self-sown Dara seeds sprout in summer in NJ, overwinter, and then flower the following summer.

Here in New England, Johnny’s Select Seeds calls them an annual and recommends direct-sowing them. I can vouch that the ones I purchased as seedlings sown in a six-cell pack in the spring established themselves fine in my garden and bloomed the same summer. Is it a thug here? I’ll find out this summer.

A few takeaways…

  1. This flower fits in beautifully in casual gardens.
  2. Pollinators love them.
  3. Johnny’s recommends direct-sowing the seeds, but starting them indoors for later transplant also works.
  4. Plant them in groupings for greater effect.
  5. If you’re concerned about them taking over your garden, take efforts to contain them until you see how they behave in your area.
  6. Give them some kind of support to help keep them upright. I used twine and garden stakes.
  7. Dara is not a cut-and-come again flower like zinnias. You’ll get more than one flower per plant (7-15 stems per plant, according to Johnny’s), but it won’t keep producing all season. Still, its season extends a month or more, and multiple, staggered plantings can achieve a longer period of bloom. You may also get a longer blooming period if you keep them cut. I just didn’t have the heart to take them all from the bees.
  8. For best longevity in floral arrangements, cut them after they’ve fully opened. And once they begin to curl up, they’re on their way to seed.


Spring In the Wings

Overall, this winter hasn’t been a bad one here on the South Shore–right?–but it seems to be going out with hooks.

So I’ve put together a list of a few garden-related doings to get us to the end. After all, opening day at PPCG is only a little more than a month away, and then we’ll be within easy reach of peas.

Boston’s Community Garden Scene

Next week on Wednesday, February 27, the Trustees, which owns and operates the largest chunk of community gardens in Boston, is showcasing a documentary film about Boston’s community gardens at More Than Words bookstore. Pre-registration recommended. Reduced rates for members.

Gardening Aside

By the way, More Than Words is one of my favorite indoor spaces, a used bookstore run as a nonprofit, so if you’re just looking for a nice place to get out of the cold, go check it out. I don’t know their schedule this year, but in the past they’ve held big sales on/around March 17. (And while I’m on the topic of used bookstores, have you been to the Montague Bookmill in western Massachusetts? It’s a great road trip destination with a few good hiking spots nearby.)

Countertop of Greens

Grow a crop of microgreens before you need your sunny/lamp-lit spaces for seedlings. Here’s my favorite how-to video. Or sign up for Holly Hill Farm’s workshop on growing microgreens on March 9 from 1 – 3. Or buy a bunch of greens and shoots at their weekly farm stand. See their website for details; locations vary.DSC_1648

Season Extender

Do you have a little yard space? Holly Hill Farm is also hosting a workshop on building cold frames on March 9 in the morning. Email cprentice@hollyhillfarm.verizon.net for details and to register.

A Day of Gardening How To

The 44th annual Gardeners’ Gathering is being hosted by The Trustees at Northeastern University on March 23. Free and open to everyone!

For Your Sweet Tooth, the New England Way

Brookwood Farm is holding its annual Maple Sugar Days Festival on March 23 & 24, from 10 – 4.

A Different Boston Gardening Scene

This year’s Boston Flower and Garden show runs from March 13 – 17.

Local Stars

Ugh, have you seen that report on declining insect populations worldwide? Planting native species can help attract and sustain beneficial insects. Author Russ Cohen presents Nibbling on Natives in Your Back Yard and Beyond. Free and open to everyone at Hingham Public Library on April 7 from 2 – 4.DSC_0345

Library Harvest

Have you used Hoopla, a free source of electronic media that’s available at our public library? Hoopla currently has a surprising number of gardening books, such as Countertop Gardens, Indoor Kitchen Gardening, High Yield Vegetable Gardening, and Thrifty Gardening. Or how about Dogscaping, How Carrots Won the Trojan War, or A Woman’s Guide to Cannabis?

Braintree’s Hidden Garden Source

Go check out all of the living things growing indoors under lights at Gardin, which outgrew its location at New England Wildlife Center and moved to its current warehouse space at 137 Bay State Drive, near the Braintree high school.  This place makes you want to turn your whole house into a terrarium. They have a huge array of indoor and outdoor growing supplies, some of which are hard to find elsewhere in our area, plus friendly, informed service. Matt helped me pick out a grow light for starting some microgreens and herbs on my countertop.

Plus, they have a turtle. This guy has the best turtle home ever.

Hang in there, everyone.


Deer Vs. Gardeners II

I used to say that while we had a few deer visitors every year at PPCG, the humans always took home more from their gardens than the deer did.

And then last year happened.

Going into our 2019 growing season, I’m going to assume that if we want more harvest than heartbreak, we’re going to need to start off with active defenses. The good news is that many of us found some reasonable solutions that worked well for us.

For more info about deer control, see this post. Here I’m going to focus on the methods that seemed to work well for our gardeners, along with a few sources and best prices. (If you find some better options, please share!)

Repellent: Plantskydd

At least one of our gardeners, Gary  (plot 31), had good luck with this product, which is sprayed on plants. OMRI-listed, it’s main ingredient is dried animal blood. For the best results, you’ll want to spray it early in the season, before deer get a taste of what’s in your garden. 

Pros:  One of the least expensive options in terms of initial outlay. No need to struggle with fence installation. Allows you to keep your garden open and easily accessed. Doesn’t wash off in rain. Organic.

Cons: Needs to be applied to new growth, so you do have to keep up with it. Since its main ingredient is animal blood, it (1) may not be an option for vegetarian gardeners and (2) will add nitrogen to your soil, which you may or may not want. Also, although the product specifies it’s safe for garden vegetable plants, you can’t spray it on any part of the plant that you intend to eat, such as lettuce leaves or tomatoes. There’s also a granular formula that you can sprinkle around your plants.

Available at: Amazon for $23.99 for a 32-oz. spray bottle or at Park Seed for $21.95. Check here for local dealer locations. You can also buy larger quantities in powder concentrate that you have to mix and a granular formula for sprinkling.

Fence Option 1: Multi-Purpose Netting

IMG_20180503_103531591.jpg
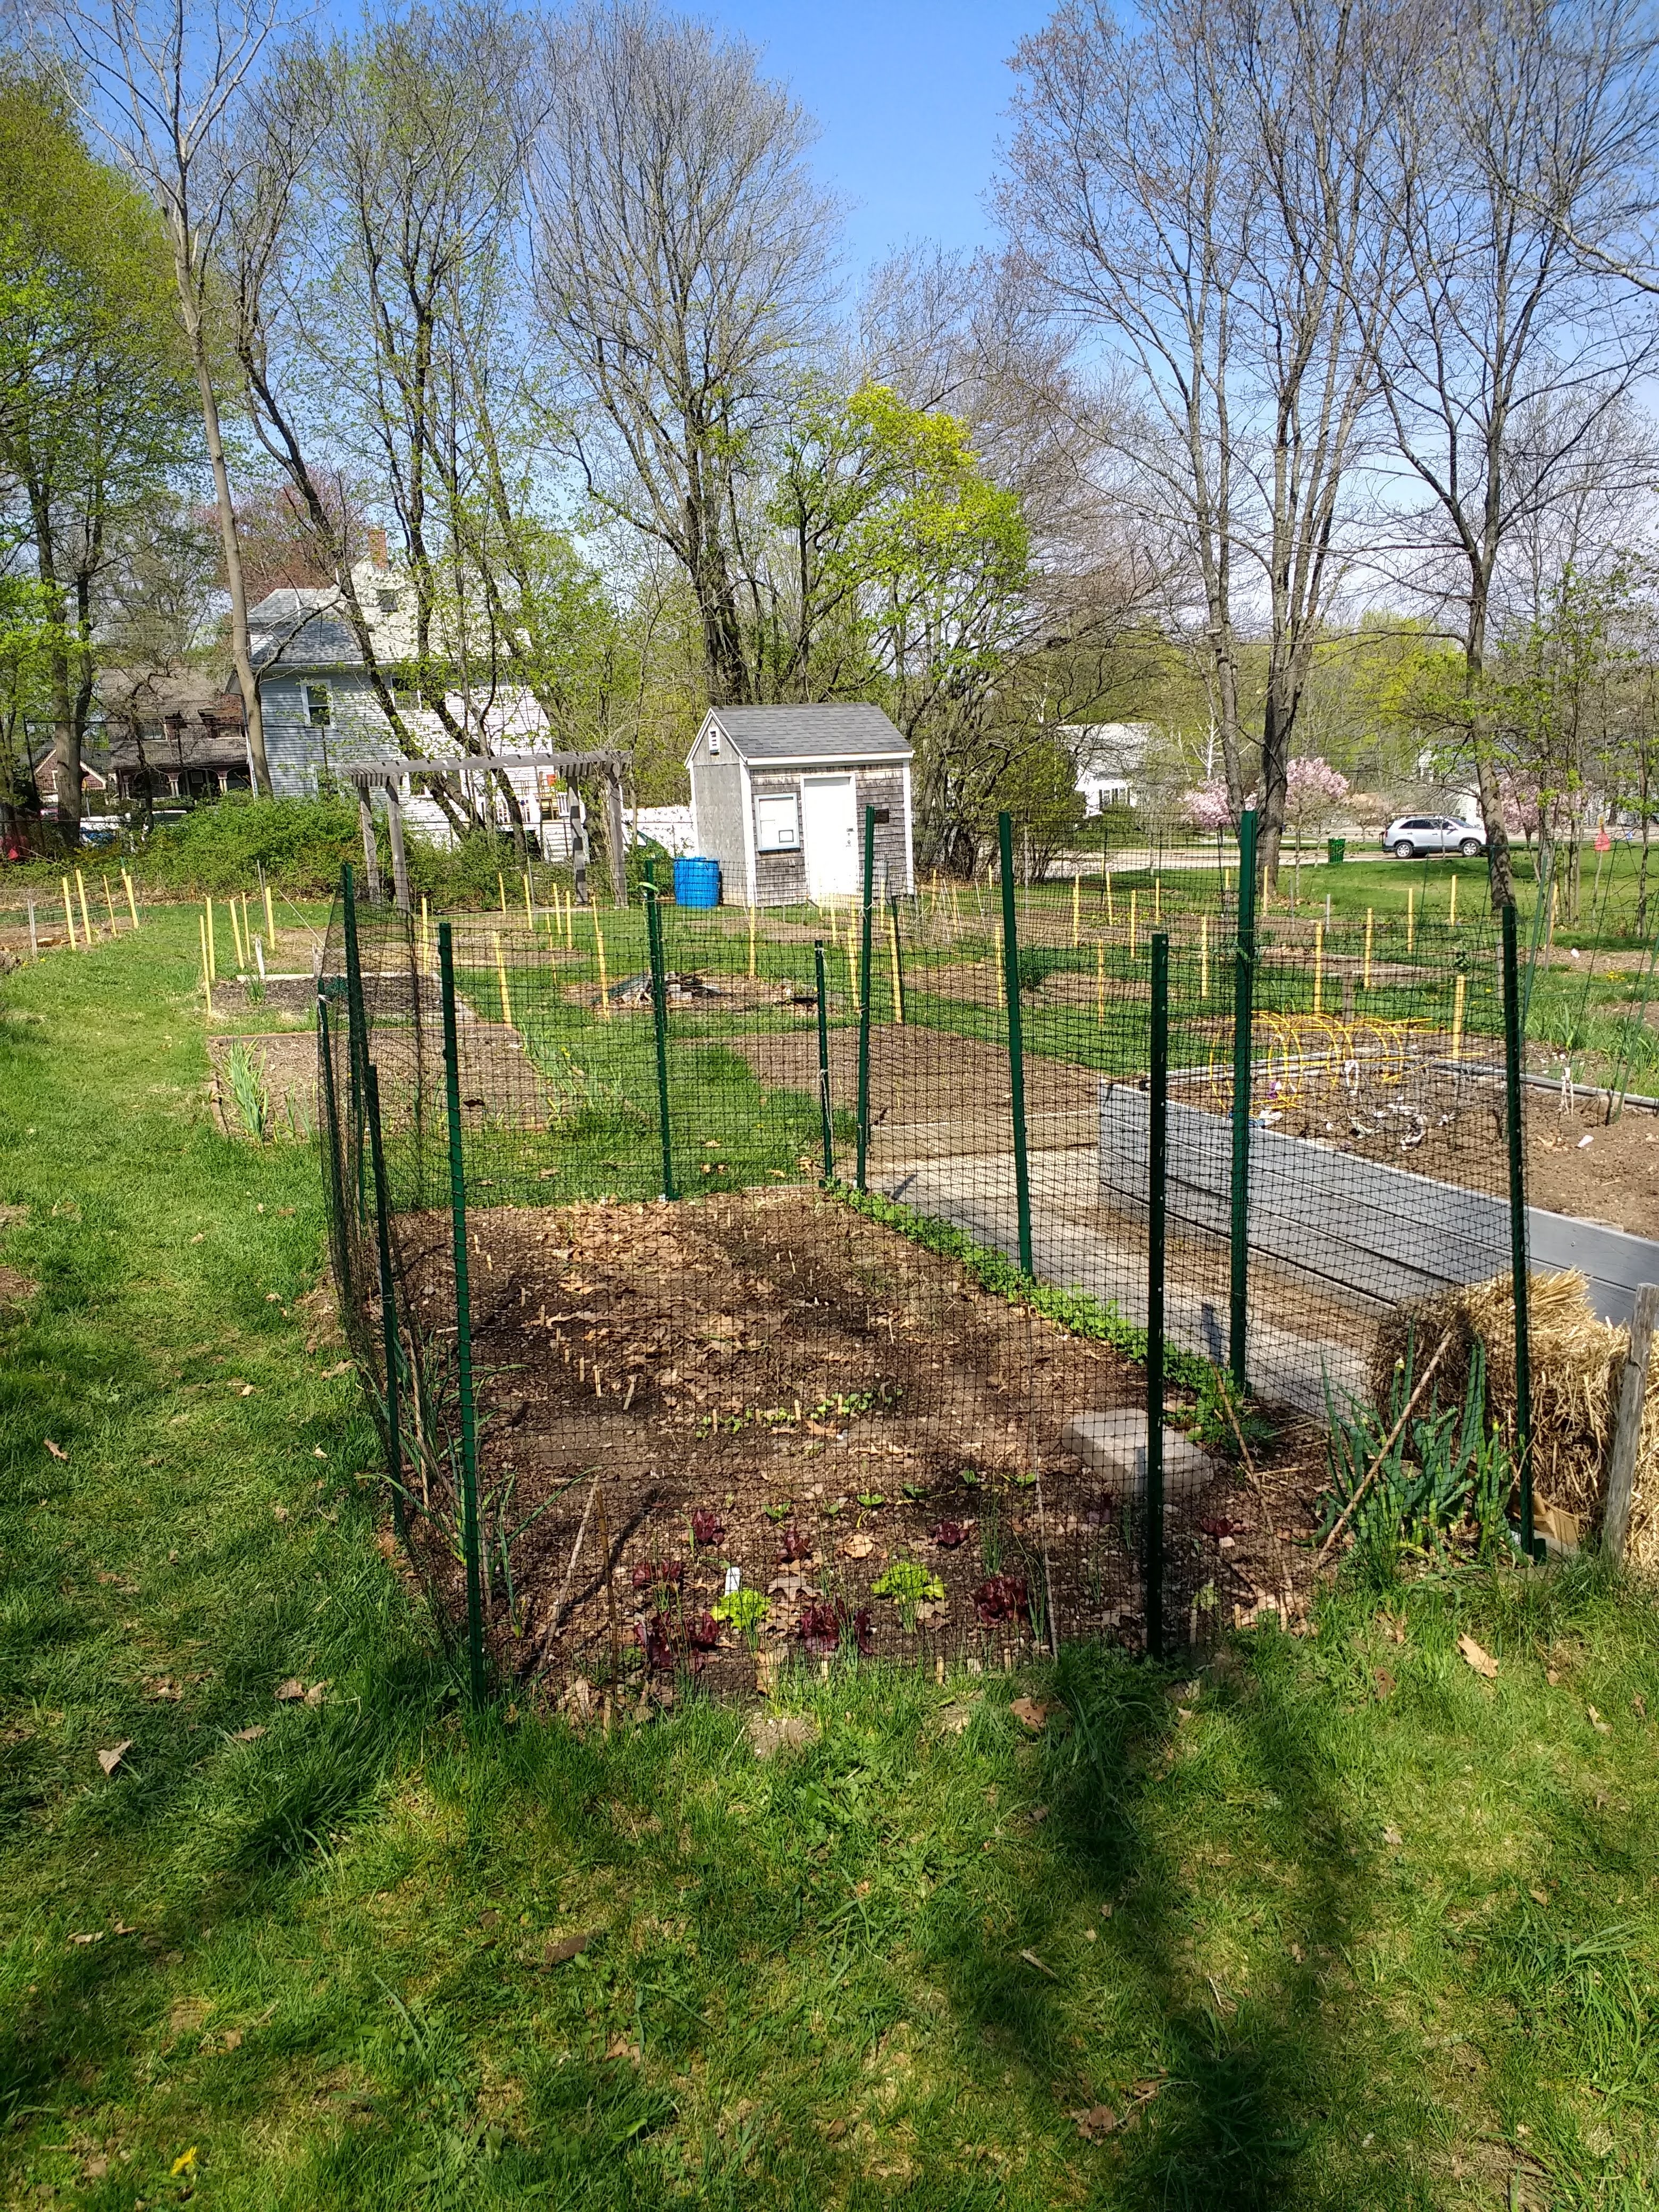
Jun (plot 24) and I (plot 30, photo right) used this product by Tenax with good success. At 4-feet tall, it’s an easy jump for deer,  but I’ve read that deer don’t normally like to jump into enclosed spaces as small as our gardens. For extra measure, I put a few obvious tomato cages inside my plot to clutter up the landing zone.

This product is sturdier than the netting described below, but not really sturdy enough to support  vines such as cucumbers. I installed it using 60-inch u-posts, slipping the fence onto the hooks on the posts as I wrapped it around the garden. 

Pros: Sturdy. Should last a few years. Relatively easy to install; I was able to do it myself. Most difficult part for me was pounding in the u-posts. Allows easy access to gardens–just unhook the netting from the posts. (The whole garden can be opened quickly and easily.) Even though it’s thicker than the deer netting below, it’s still unobtrusive and doesn’t cast significant shade. Can also be purchased in 7′ x 100′ rolls, enough to keep out jumpers from two garden plots. 

Cons: Costs about $24 for the netting plus $27 – $45 for 6 – 10 u- or t-posts. Not a good choice for folks who don’t want to go to the trouble of installation or who don’t like enclosed garden spaces. Not tall enough to prevent jumpers or “leaner-overs.” The 7′-tall fencing will need sturdy, more expensive posts to be installed properly.

Available at: Lowes in Weymouth and on Amazon.


This slideshow requires JavaScript.

Fence Option 2: Deer/ Wildlife Netting

Product Image 2
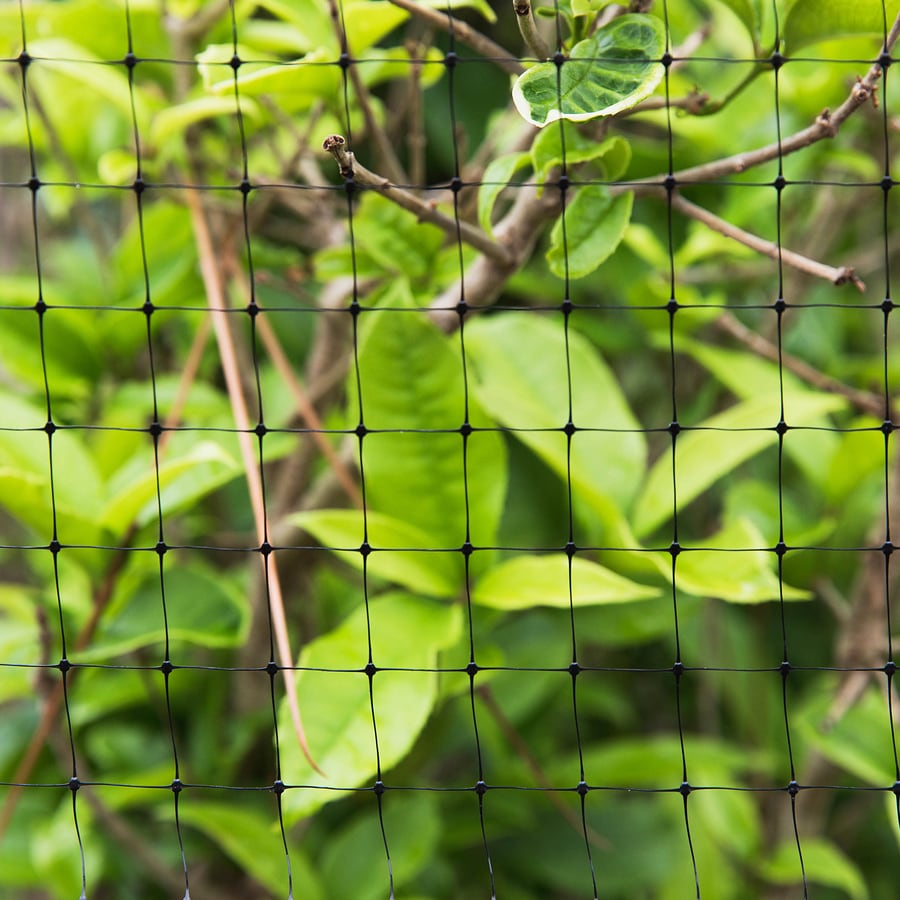
A few gardeners used a product like this one, which is finer and less stiff than the multi-purpose netting above. They installed it using bamboo or green plastic garden posts, attaching the fence to them with twine, zip ties, or tomato Velcro. I’ve also seen recommendations to hook the netting onto nails, screws, or cup hooks fastened to wooden garden stakes, which then could function a lot like the netting above.

Pros: Tall enough to keep the champion jumpers out. Reusable. Lightweight and unobtrusive. No problems with product casting shade. Depending on how it’s installed, it can be removed easily if you need better access to your garden for maintenance, etc.. The cost of the netting itself is reasonable, around $20.

Cons: Must be secured properly. Potential tripping hazard. Does a number on our lawnmower. Ideally, should be marked with flagging tape so deer see it and don’t blunder into it. Could be chewed or torn. A little fiddly to use. Best installed with a second set of hands. To make full advantage of the height, you need tall support posts, which may cost more than the netting itself.


This slideshow requires JavaScript.

Barrier Cover: Bird Netting

Bird netting is similar in weight to the wildlife netting above, but sold in dimensions that allow you to drape it over large sections. This option is a good, inexpensive one if you want to protect certain plants or sections of your garden. 


This slideshow requires JavaScript.

Pros: Perhaps the least expensive option. Allows you to section off areas of your garden, leaving open access to other areas. 

Cons: Like the wildlife netting, it’s fiddly to use. Must be secured properly! (I used clothes pins, attaching the netting to twine stretched between stakes.) Potential tripping hazard. Gets tangled in our lawnmower. Depending on how it’s installed, can make garden access annoying. Your plants won’t like bumping up against it, so your netting supports have to be taller than your plants at full height.


Available at: Lowes in Weymouth and Home Depot in Quincy. (See photos below.) 


This slideshow requires JavaScript.

Final Thoughts…

Repellents, fencing, or cover netting…there’s no perfect solution here, but we managed to find a few workable options that allowed us to recover last summer. Pick the one that works best for you and go for it–early in the season. It’s better to set up your repellents and barriers as soon as possible, before deer get a taste of the good stuff  in your garden.

Happy gardening, everyone!


Growing Organic Garlic

Recently Jon Belber, Education Director from Holly Hill Farm, joined us at the community garden to share some tips on growing garlic organically.

dsc_1378-2

Many of us in the community garden have already cleared our beds of summer debris and prepped them for winter and/or are still picking kale. But if you’d like to enjoy a garlic harvest next July,  now’s the time (late October through November) to get going on it.

Hardneck vs. Softneck Varieties of Garlic

Hardneck varieties of garlic grow stiff flower stalks known as scapes. They tend to be better suited for cold climates such as ours (Zone 6); in fact, like daffodils and tulips, they require a period of cold dormancy.

Without a stiff flower stalk, softneck varieties remain floppy and can be braided. In general they store for longer periods of time than hardnecks. More info on comparisons here and here.

How to Plant

  • Be choosy about what you plant! You’re more likely to have good results if you purchase garlic bulbs from a reliable source. Most of us don’t have much growing space, so make the most of it and save grocery store garlic for eating.
  • Carefully break the garlic head apart into its individual cloves, trying to keep as much of the papery coating intact. (The paper is its protective seed coat.)
  • Again, be choosy. Don’t plant any soft cloves and select the biggest cloves. The small ones will grow, but won’t be as robust as the garlic plants that start out with more stored resources. Save the little guys for cooking.

    This slideshow requires JavaScript.

  • Following crop rotation practices, it’s better to select a site where Alliums (leeks, shallots, onions, etc.) did not grow in the previous few years.
  • Prepare your garden bed by loosening the very top layer of soil and laying down some compost. There’s no need to do a lot of digging and disrupting of the soil structure in your garden unless it’s hard and compacted.
  • Where you are planting your garlic, run a shallow trough around twice the depth of your garlic cloves.
  • Tuck in the cloves with pointy tips up about 5 – 6 inches apart in the trough. Garlic cloves planted upside down will still grow, but they’ll have to spend extra energy orienting toward the soil surface, and you’ll end up with a garlic plant that looks like the one below.
  • Cover with soil.
  • Top with a generous few inches of mulching materials, such as shredded leaves or straw.

    dsc_1393-2
    When using leaves as mulch, make sure they’re composted or shredded as above; otherwise, they can form a dense matted layer.
  • Green tips may emerge above ground around February. (Sometimes this growth appears in late autumn and then stalls; generally the plant will not be adversely affected, though the growth may whither and lose its green color in freezing temperatures.)

During the Growing Season

  • Around June, hardneck varieties of garlic produce curly flower stalks known as

    img_20180620_140043409
    If allowed to grow, garlic scapes curl, swoop, and flower. Too beautiful to cut? Enjoy them in a floral arrangement.

    scapes that should be removed to allow the plant to send more energy down to the bulb. Cut off this part when it starts to curl, but don’t throw them away–the scapes can be used to make a pesto, cooked and used for mild garlic flavoring, or even added to floral arrangements. More cooking ideas here.

  • Pull the garlic plants around July 15 . You can eat them right away if you enjoy assertive garlic flavor. Or cure them in a warm dry place with good air circulation, away from direct sun.  When the neck is dry and the skin papery (in about 2 – 3 weeks), they can be stored in a cool, dry, well-ventilated place (not the refrigerator). Different varieties of garlic will hold for varying lengths of time.
  • Make use of the space where you harvested your garlic by digging in some compost and planting a succession crop such as quickly-maturing carrots or green beans.

Mail-Order and Local Sources

Holly Hill Farm purchases their garlic from Fedco SeedsJohnny’s Selected Seeds is another reliable source for types that grow well in New England. At the end of October, it’s too late to purchase garlic bulbs from most mail-order sources; still, it’s worth checking out these sites now simply as a reference. Plan ahead for next fall; these sources can run out early, well before planting time.

But there are still options right now. I had good success last summer with the garlic I purchased from the organic grower at Braintree’s farmer’s market. (There’s one more market day scheduled on Nov. 17.) Hingham Farmer’s Market is still running weekly. And Holly Hill Farm is hosting a garlic festival on Nov. 3, 2018, where garlic will be available for sale and farmers will be on hand to run garlic-planting demonstrations.